The name Exploding box is given because , it explodes or spreads to all directions just like a bouquet coming out from a magician's magical hat .The lid holds the sides or panels in place and when it is taken , the box explodes out into a card . This is one simple , easy attractive way of expressing .A perfect gift to your partner or a friend or to your parents .

Try this card for this coming Mother's Day to surprise your mother which depicts and embeds all your beautiful moments you share with her . She must be thrilled to receive such a thoughtful and valuable present . Not every gift can do that unless if it is a hand made with your creativity .
I have selected a simple shape like square which is very easy to construct (nothing can go wrong ) if crafted with interest . You can check out some simple instructions or for free templates for different shapes on Internet .
Exploding box Free Templates this is one sample link .

Using contrast matching craft paper or card stock gives a vivid look to the card .The construction itself is very simple and the grace stands with your unique memory collection of photos or poems or decorations
All you need ::
- Card Stock
- Embellishments of your choice like buttons, stickers or glittering tape or photos or lace
- Glue
- Scissors
- Ruler (for straight and exact measurements )
Here I have used three different colors , which helped to get a vibrant look, when it popped, the layers are like pages of a book , but with striking difference in colors and patterns.
You can add more number of pages or sides inside , or you can glue a doll ( be sure that the doll height measures much less or at least less to your box height ) or a craft cake / popping cake according to occasion and the person you are gifting it .
- Select card stock colors and patterns which you have decided to be the sides or panels for the box .I have selected light leaf green colored paper with a simple pattern like squares to be the base of my box.
- Secondly I have selected blue and beige colors as inner sides or panels of inside boxes . In which , the beige colored paper has a contrast colored patterned circles , and a blue colored card stock with two different patterns like stars on one , and self pattern on the other
- Mark the dimensions according to the template measurements for the three (or more) layers of papers and cut accordingly , try to be accurate . Now glue the inner panels or card stocks onto the base paper


- For lid I chose golden yellow , which matches very vibrantly with green (any shade ) , again follow the instructions accordingly with precision .
- Fold in the corners inside as if the edges supports one another , and glue accordingly
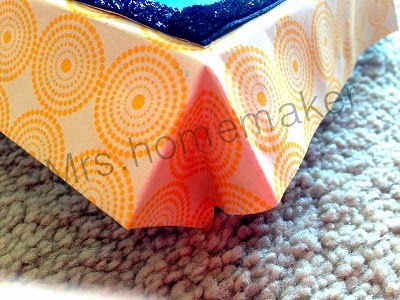
The box pops like this when opened

- The done lid after the glue has set , it should be sturdy, and ready to fit on to the card .

- Finally after both the card and lid are dried and set , embellish them accordingly . If you wish to add any doll or cake you can glue to the inner most paper at the base centre .
Notes:
- Follow the instructions from the selected , template (either hexagon or square ), you should be cautious with the measurements as they are very important for the box to close ,from all sides exactly at same height .
- The lid measurements are even important to be fixed to the card and sit tight on top as if a box
- The contrasting match is not necessarily , a criteria , you can opt even same colors for all the boxes ,with a different colored lid
- The box when closed from all sides with lid, when followed all dimensions accurately must be sturdy just like a cubicle
Amazing!!! Very creative :)
ReplyDeleteIt's Very nice.......
ReplyDeleteThank you SelfDriveTrips
DeleteThank you Anjali , happy that u liked it
ReplyDelete